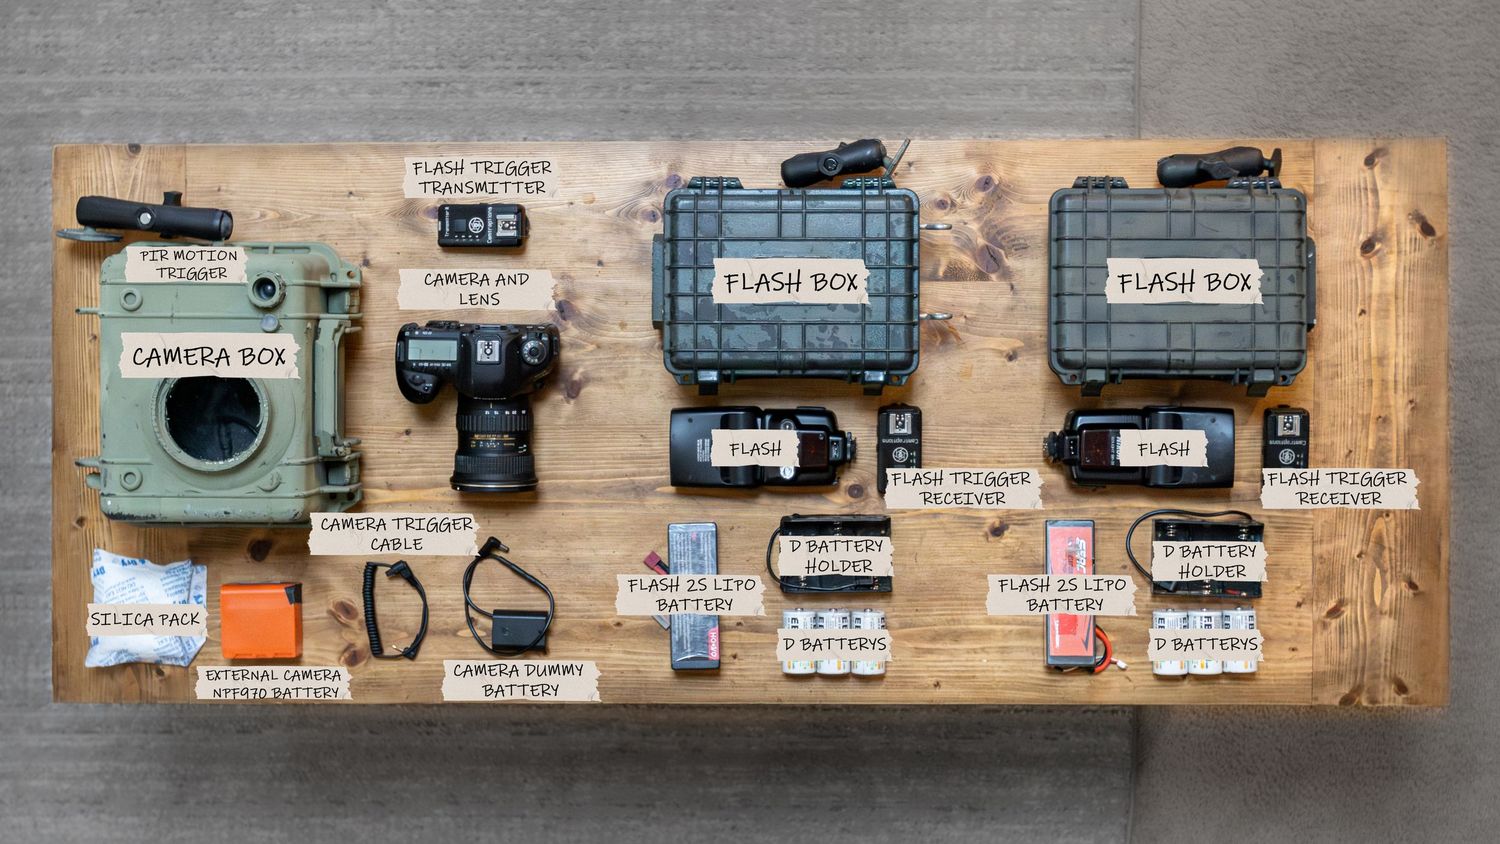
I’ve talked a lot about camera traps over the years, but I’ve never actually broken down all the individual parts and pieces and how it all works together to get great wildlife photos. So here’s the whole setup laid out on the table with every piece labeled. This is the exact rig I actually use in the field. It’s taken me years of messing around, trying stuff, and fixing what breaks to get it where it is now. I’ll just go through each part and tell you what it does and why I use it.

On the far left is my Camera Box. It’s a Pelican case — super tough and weatherproof with a built-in PIR Motion Trigger. That PIR is what picks up the heat from animals walking by and wakes everything up. The box keeps rain, snow, dust, and critters from wrecking all the gear. I use RAM mounts to securely attach the camera box to trees. If the camera box leaks, it defeats the whole point of dragging everything out into the woods and you’ll end up missing shots.
Right beside it is my actual Camera and Lens — my Canon 5D Mark III full-frame DSLR with the Sigma 12-24mm f/4 lens. A Camera Trigger Cable hooks the PIR straight into the camera’s remote shutter so it fires the moment something moves.
Power is important when you’re leaving this thing out for weeks or months. I use a Camera Dummy Battery so the camera runs off an external source instead of killing its own battery. If you left the camera in the box with its own battery it would only last a few days. That hooks up to my External NP-F970 Battery. That battery is great — it can last 2+ months and take 2000+ photos on one charge. I also throw in a few Silica Packs inside the box to suck up moisture and stop the lens from fogging or the electronics from getting messed up.
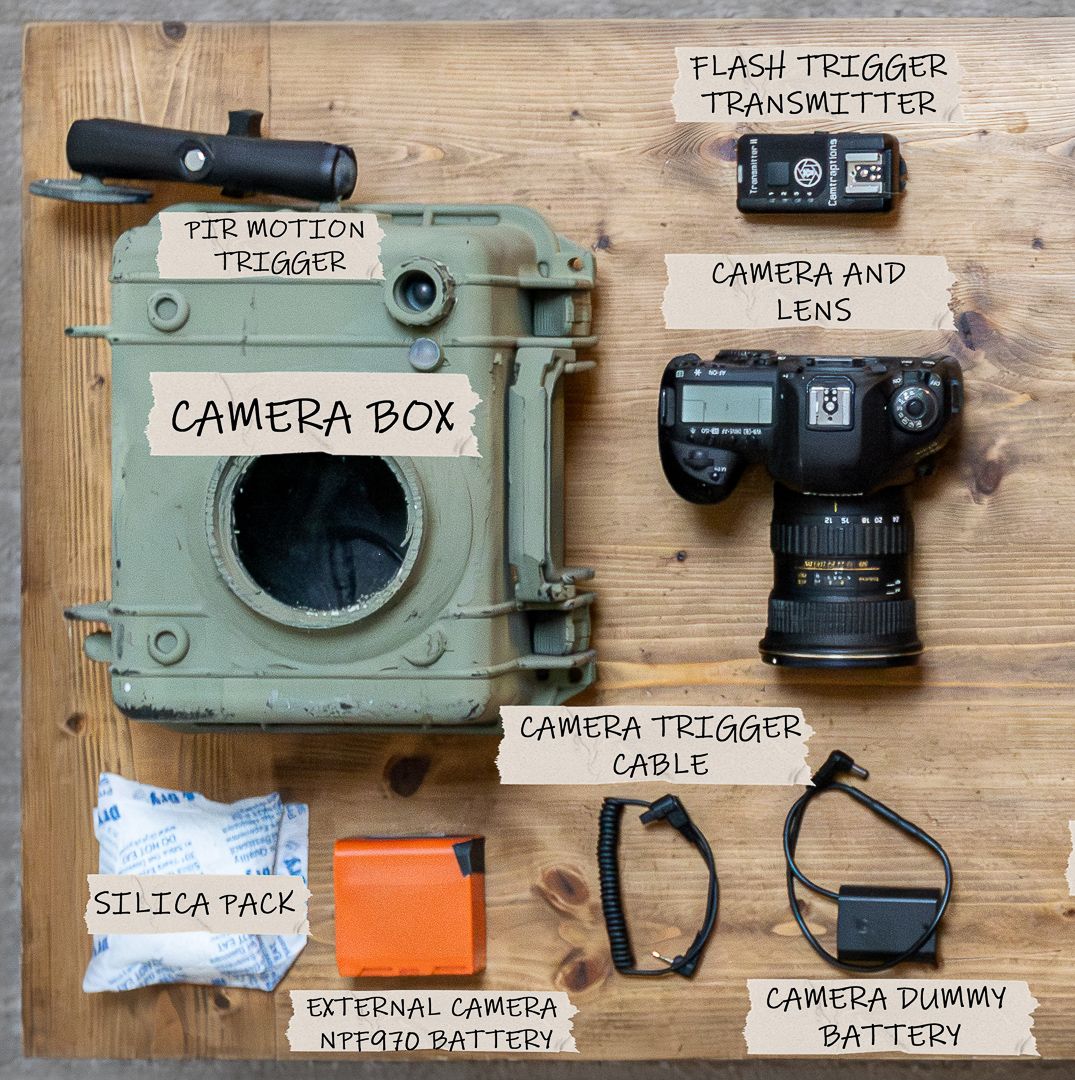
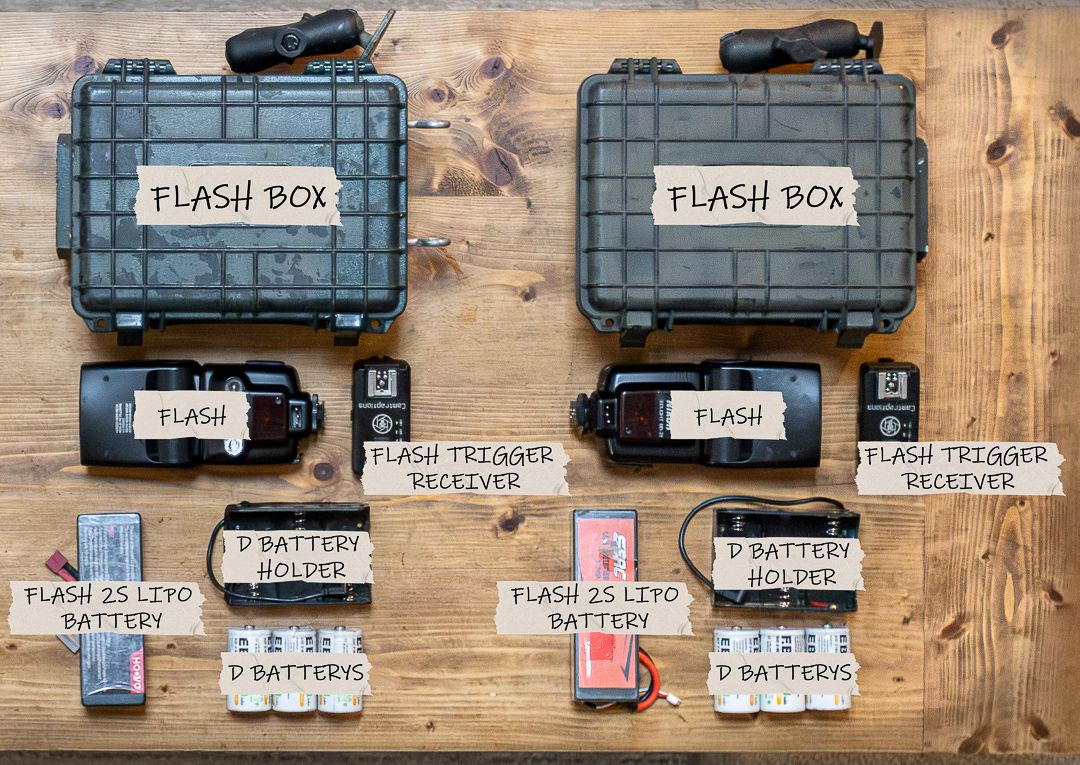
For night shots the flash system is key. Up top is the Camtraptions Flash Trigger Transmitter. When the PIR trips, it sends a wireless signal from the camera to the flashes so they go off at the right time. There are 2 flash boxes shown here. Sometimes depending on the setup I run 2 to 4 flashes to get the lighting right. The flash boxes are made using Apache cases to keep them watertight and safe from the wildlife. I also use RAM mounts to attach the flash boxes to trees. Each flash has its own Camtraptions Flash Trigger Receiver attached. The receivers grab the signal from the transmitter so all the flashes fire together. I usually set the flash boxes a little ways away from the camera for better light and to avoid weird shadows or red-eye.
For powering the flashes I use a 2S LiPo battery (usually 5200-6200mAh) with a 3D printed dummy battery that slides into the flash’s AA slots. The Camtraptions receivers are always the first thing to die — they suck a ton of power because they’re constantly searching for the signal so they don’t miss a shot. That’s why I power the receivers with 3 D batteries. That combo works pretty reliable.
When it’s all set up it works like this: Animal walks by → PIR picks it up → camera fires through the trigger cable → transmitter tells the receivers to pop the flashes → camera takes the shot → then everything goes back to sleep quick. That fast cycle is why this rig can stay out for weeks or months without dying.
I like how modular it all is. Need more flashes? Just add another box. Batteries getting low? Swap them out. Something breaks? Usually easy to fix in the field. This setup has been through rain, snow, heat, and plenty of nosy animals and it’s still going strong.
I’m always tweaking this thing, so if you’ve got questions about building your own, what parts to buy, battery options, or whatever, drop a comment. Happy to help


